Integration Type
The data for the Integration Job is made available in different information and/or CSV files.
Integration Type | Description |
Zoom | User name:
Upon saving the integration job, users will authenticate in Zoom. Users are transferred to the Zoom website.
NOTICE! To import the recordings, the user’s email address or UPN must be the same in Zoom and Recording Insights.
The user name is displayed upon successful authentication with Zoom.
NOTICE! After successful authentication, the button Reauthenticate with Zoom app is displayed.
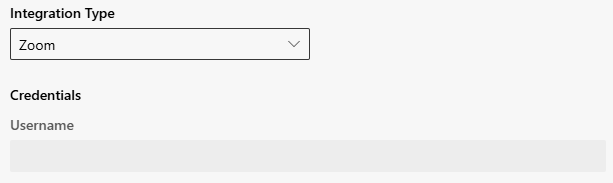
Reauthenticate with Zoom app:
- Click on the button Reauthenticate with Zoom app to reauthenticate in Zoom.
|
RingCentral | - The JWT token is created by the customer in the RingCentral portal and provided to Recording Insights.
- The customer’s JWT token must be entered in the credentials in the field JWT Token.
- When a JWT token expired, a new JWT token for the corresponding integration job must be created and exchanged with the old one.
NOTICE! To import the recordings, the user’s email address or UPN must be the same in RingCentral and Recording Insights.
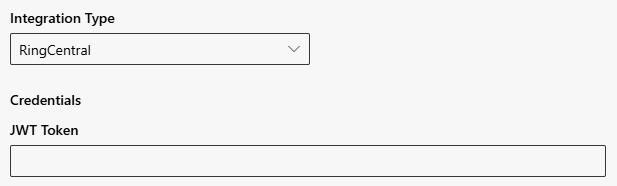
- Enter the credentials of the JWT Token.
|
Genesys | Credentials must be provided by the customer.
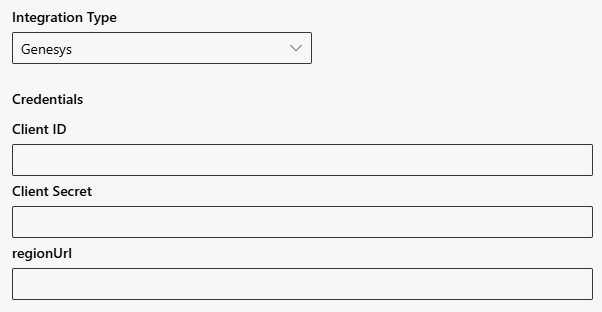
- Enter the Client ID that was created in the dialog of the oAuth app in Genesys.
- Enter the Client Secret that was created in the dialog of the oAuth app in Genesys.
- Type in the regionUrl. This is the cloud location that Genesys uses for installation.
- Fill out all fields regarding ParticipantData.
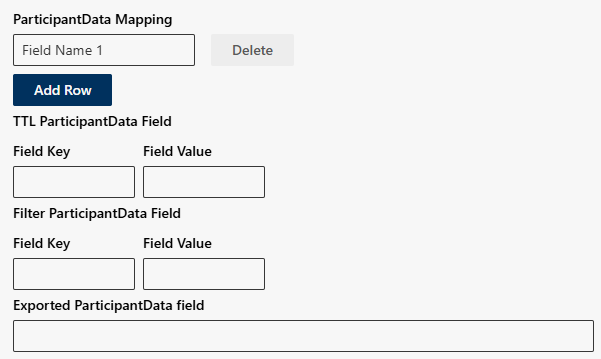
- Enter a field name for the ParticipantData Mapping. They get mapped to assigned RI custom fields only, if the name matches with the field name from Genesys ParticipantData.
- Click on the button Add Row to add the field name to the Integration Job.
A drop-down field named Custom Field is displayed. - Choose a Mapping custom field from the drop-down list. Predefined custom fields in RI which stores the value from the associated Genesys ParticipantData field.
- Type in the TTL Field Key and the Field Value.
A drop-down field named Custom Field is displayed. - Choose a TTL custom field from the drop-down list. This triggers TTL adaptions if conditions are met.
- Type in the Filter Field Key. The name entered for the Field Key that is to be compared with the ParticipantData from Genesys in order to perform the filter function.
- Enter the Filter Field Value. If the Field Value of the Field Key matches, the conversation is not imported.
- The exact timestamp of the export is displayed in the field Exported ParticipantData Field.
NOTICE! The Integration Job runs periodically once a day at 2 am UTC. Only conversations since the last successful run will be imported.
|
Dynamics | Credentials must be provided by the customer.

- Enter the Client ID.
- Enter the Client Secret.
- Type in the integrationDynamicsUrl.
- Select the checkbox if you want to keep the call object open after synchronization with Microsoft Dynamics.
- When enabled, the backend will not automatically close the call record once processing is complete. This allows you to manually update, edit, or add follow-up actions within Dynamics after the import.
- When unchecked, the call object is automatically closed by the system after synchronization, ensuring that only finalized records remain open.
|
LeapXpert | Key file with passphrase for decryption is created by LeapXpert from the customer data provided.
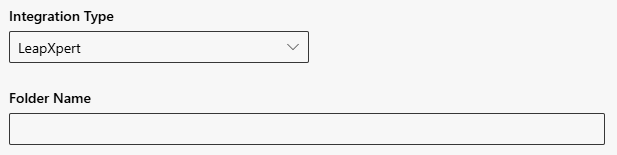
- Click on the button Upload to upload and save the LeapXpert Private Key file. Depending on your operating system, the installed file manager opens.
- In the field Private Key Passphrase, enter the password.
- Click on the button Folder Name to define the target directory in Recording Insights.
|