Create, edit and delete dashboard
You can use several dashboards to group the content of reports. This allows optimizing the workflow and administrating access for relevant users.
Create and manage your own dashboard folder for various tasks.
- Dashboard User: The default folder is the preselected dashboard which is always available. All reports and data that the user has created for themselves are displayed in this dashboard. Factors influencing this are individual settings and authorizations.
- Custom Folders: Custom folders allow organizing reports according to one’s own requirements. Users can create a custom folder, give it a name and add further users. This means that reports and data are processed and analyzed together.
1 |
|
|
2 | Pin Dashboard |
|
3 | Dashboard User | Selection of default dashboard folder and created dashboard folders. |
4 |
|
|
5 |
|
|
Create new dashboard folder.
- Click on the icon
 to create a new dashboard folder.
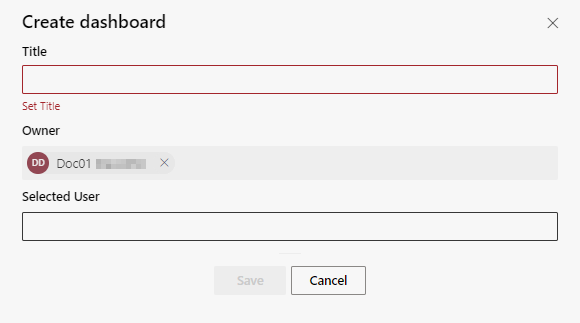
- In the field Header, enter an unambiguous name for the dashboard folder.
- Click in the field Selected User.
- Enter the first letter of the name of a user.
Selected users are all users who are supposed to access the folder in addition to the owner. - Select one or several users from the drop-down list.
- Click on the button Save to save the settings.
Click on the button Cancel to discard the settings.
Select dashboard folder
- Click in the field Dashboard User
 to select either the default dashboard folder or a custom folder.
 - Select the desired dashboard folder from the drop-down list.
Edit or delete dashboard folder.
- Click on the icon
 , to edit or delete a created dashboard folder.
The default dashboard folder cannot be changed or deleted. - In the field Header, change the name of the dashboard folder.
- Click in the field Selected User to add additional users.
- Enter the first letter of the name of a user.
- Select one or several users from the drop-down list.
- Click on the button Save to save the settings.
Click on the button Cancel to discard the settings.