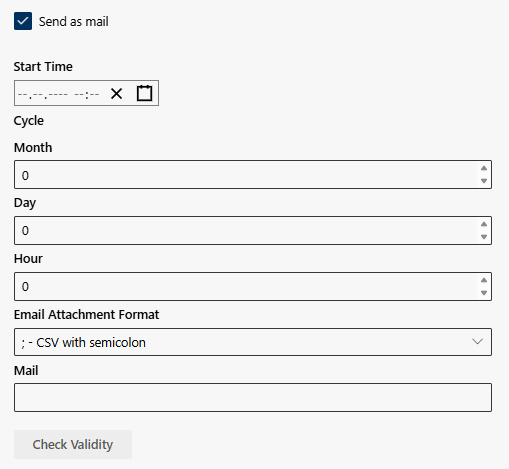
Here you can have an e-mail sent to you at a specific time.
Send as mail
Legend
Option / function
Description
1
Start Time
In the field Start Time, enter the day and the time when reporting is supposed to start.
NOTICE! For a detailed description, see table Time input later on this page.
2
Cycle
Specify the intervals at which an e-mail is sent to the recipient(s). Enter the desired cycle in the Month, Day and Hour selection fields.
3
Mail
Enter one or more e-mail addresses in the E-mail address field.
NOTICE! To add multiple e-mail addresses, separate the e-mail addresses with a comma. Depending on the client configuration, e-mails can be sent internally and externally.
4
Email Attachment Format
You can have the report sent to you in CSV format.
Click in the drop-down field and select whether you want to receive the CSV file with semicolon or comma separation.
5
Check Validity
Click on the button Validity check to check whether the e-mail address(es) correspond to the specifications of the client configuration.
Time entry
Time input for date and time
Legend
Option / function
Description
1
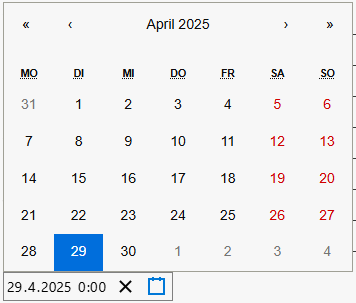
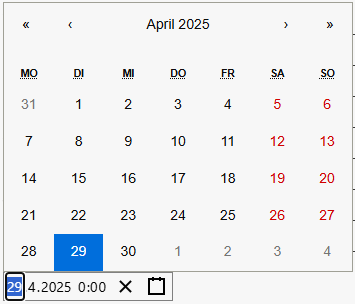
Date
Date in the format DD.MM.YYYY
Click on the empty date field.
Select the date in the calendar or enter the date using your keyboard.
NOTICE! You can also enter the date using the calendar symbol.
2
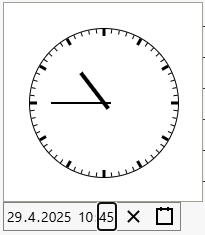
Time
Time in the format HH:MM
Click on the empty time field.
Enter the date using your keyboard. Selection via the graphic is not possible.
3
Reset
Date and time reset.
Click on the symbol to reset the date and time.
4
Calendar
Date in the format DD.MM.YYYY
Click on the calendar.
Select the date in the calendar.
NOTICE! You can also enter the date using the date field.
 symbol to reset the date and time.