Configure Export Job
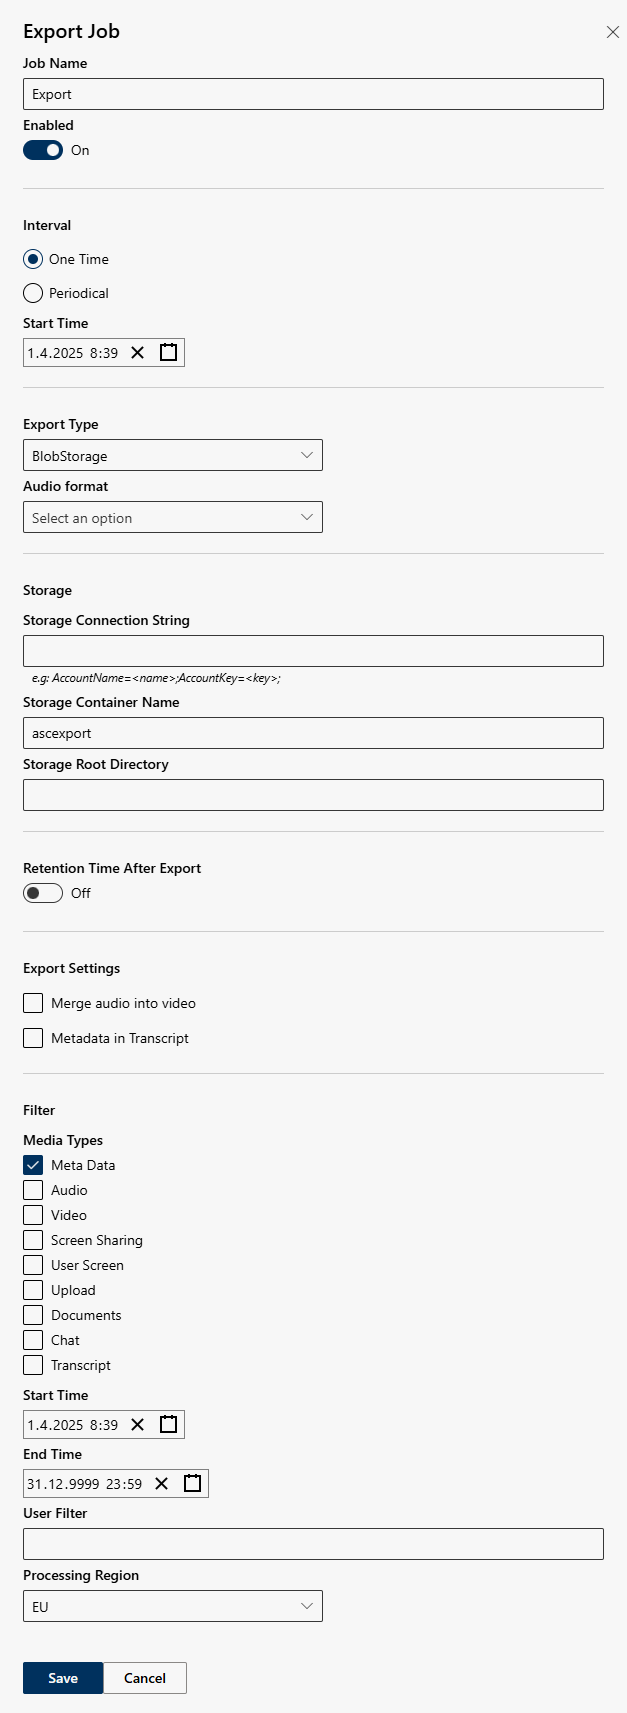
Export jobs enable the automated export of recordings to external storage locations. You can precisely define the destination, format, schedule and filter for the data to be exported. The following table provides an overview of the available settings.
Create a new export job:
- Click on the button
 Create Job
 .
. - Click on the button
 Export Job.
 - In the field Job Name, enter an unambiguous, unique name for the export job.
Edit existing export job:
- Click on the icon
 .
. - The selected export job configuration is opened.
- Changing the name of the job is optional.
In the field Job Name, change the existing name to a new unambiguous, unique name for the export job. - The following window is displayed:

Configure export job
Option/Function | Description | |
Enabled | Activates/deactivates the export job.
| |
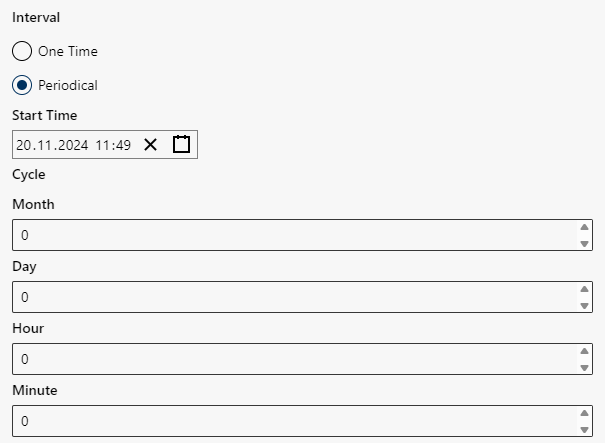
Interval | Specifies when or how often the export job is executed.
| |
Start Time | Specify the date and time when the export job is to be executed. | |
Export Type | Defines the destination of the export and the associated information. | |
Audio format | Select the desired audio format.
Conversion takes place before export. | |
Storage | Specify storage location and target directory:
| |
Retention Time After Export |
| |
Export Settings | Export video and screen sharing with mixed audio channel as MP4 file.
The option Export settings is only available for the export types BlobStorage, Hubstor, SFTP/FTP, AWS S3, and Azure Datalake. | |
Filter | Define which conversations are supposed to be exported from a certain period of time. The filters allow defining the media to be exported, from which period of time, as well as applying specific user filters or processing regions.
Configure filter, see - Filter (media, start time, end time)
The filter options allow defining the media to be exported, from which period of time, as well as applying specific user filters or processing regions. Media Types
Start Time
End time
User filter
Processing Region By means of the option Processing Region, you can select the region that the recordings are supposed to be exported to.
|
- Click on the button Save to save the settings.
Click on the button Cancel to discard the settings.
Archive created and deactivated export jobs
Only export jobs which have been created and deactivated can be archived or moved to the invisible area Historical Jobs.
Archive/Move export jobs, see Archive Export Jobs.

