Filter Settings
Here, you can define according to which criteria the displayed recordings are filtered. One filter can be saved permanently for each user.
The settings can be changed any time. The filter settings can also be saved without filter criteria (default), see figure Define filter setting (example: No filter is set up, no specifications by a replay rule).
Options for the filter settings can be preset in the replay rule, see Preset Filter Settings through a Replay Rule (examples). If specifications have been defined in the replay rule, the  symbol is displayed.
Exception: If a standard filter is created in the replay rule, the  icon is displayed. The user can activate or deactivate the standard filter.

The icon is displayed whenever a filter has been adjusted and saved for the search.
Changing settings and saving the new settings deactivates the previous settings of the filter dialog.
- Click on the icon to open the filter settings.
- The following window appears.
Select one or more options for your filter settings
The display and settings of the filter options may vary depending on the replay rule.
If specification have been defined in the replay rule, changes to the filter settings can only be made in accordance with these options.
Caption | Option / function | Description |
1 | Conversation Type |
List of conversation types:
|
2 | Cycle |
|
3 | Start Time | Individual start time and end time.
A detailed description of how to set the start time and the end time can be found at the end of this page. |
4 | (Recording Durations (minutes)) (minutes) | Selection of calls based on the recording duration in minutes.
The selected recording duration should be between 1 minute and 5 minutes. |
5 | Participants | In the field Participants, define the users whose recordings are to be replayed.
In the person selection list, users managed in Microsoft Azure AD can be searched for and selected with their user name (first name, last name) and group name. You can filter for other participants from outside your own Microsoft Azure AD by entering their phone number. Microsoft Teams saves all external phone numbers with the country code added. It is possible to filter for user groups and participants at the same time. |
|
| |
6 | Applications |
|
7 | Import Selection | Drop-down list to filter for specific import jobs. The existing import jobs are created in the user configuration.
Import jobs which are no longer required or which have been created for one-time use can be archived. |
|
| |
8 | Integration Selection |
|
9 | Category Selection |
To create and edit categories, see Tab Compliance, chapter Tab Categories or Tab Settings, chapter User configuration > Tab Categories (User configuration) according to the specified user rights. |
|
| |
10 | Policy Selection |
Only already created policies can be selected, see Add Policy. |
|
| |
11 | Conversation Safe Folders |
To create Conversation Safe directories, the following access rule is required for User access - User rights > Conversation Safe with full access or restricted access. |
 =
= =
=  =
=  =
=  =
=  =
= 
 All owners of the recordings are displayed.
 All owners of the recordings are not displayed.
 See administration manual Recording Insights: Tab Settings > User configuration > Tab Jobs > Configure import job, to create and edit import jobs.
The standard filter is displayed according to the replay rule. To activate the predefined filter types, configure the replay rule or assign the corresponding one, see the administration manual under: Tab Settings > User configuration > Tab Rules > Configure replay rule > Filter/Active.
Once you have made the settings in the administration area, you can activate the checkbox Active checkbox in the filter settings in the tab Recordings to activate the predefined filter types for replaying the recordings. The standard filter can be activated or deactivated by the user in the Filter settings on the tab Recording.
One Time Search
- Click on the button Search to filter for current settings.
- The main view only displays recordings meeting all filter criteria.
- Click on the icon
 to close the filter dialog.
 - The settings of the filter dialog are not saved.
Save filter settings
- Click on the button Save to save the settings.
- Click on the icon to close the filter dialog.
- In the future, the main view will only display recordings meeting all filter criteria.
The changes are applied as a new filter and the current settings are automatically deactivated.
Check the filter settings
- Click on the icon to close the filter dialog.
- Click on the icon
 (Refresh) to check the filter settings.
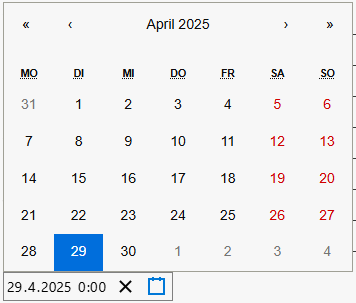
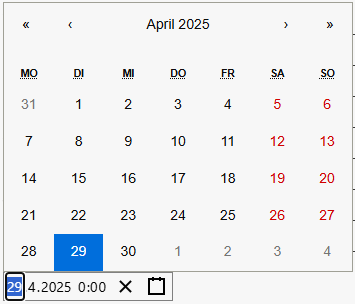
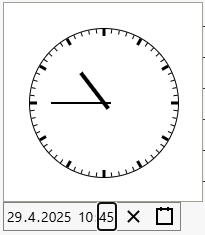
Time entry
Add a date and time to the filter. Point 3 of the table above refers to this detailed description.
Legend | Option / function | Description |
1 | Date | Date in the format DD.MM.YYYY
You can also enter the date using the calendar symbol. |
2 | Time | Time in the format HH:MM
|
3 | Reset | Date and time reset.
|
4 | Calendar | Date in the format DD.MM.YYYY
You can also enter the date using the date field. |
 symbol to reset the date and time.