Live View
The live view of the conversation enables you to start the recording of sections of a conversation manually at any moment. You can record one or more conversation sections and screen shares during the conversation. Chats can be recorded independently or in conjunction with a conversation.

The functions of the live view of the conversation depend on the user rules.
- Upon starting the conversation, you can use the functions of the live view.
- In addition, a Scenario ID can be copied to the clipboard during recording. You can save the Scenario ID in a CRM system for backup purposes, for example. The Scenario ID is used to easily find the conversation in the Recording tab.
- Upon finishing or leaving the conversation, the recording of the conversation ends automatically. If you have stopped a recording manually before that, silence is recorded for the section until the end of the conversation.
The view of the live conversation varies depending on the Recording Type. The Recording Type is defined in the recording rule.

Settings tab > User configuration > Rules tab > Configure recording rule.
Relevant recording types:
- Bulk Recording: All conversations of the user are automatically recorded.
- Recording On Demand: The user decides whether the current conversation is recorded. Recording can be started and stopped several times.
- Recording Control for Bulk Recording: This option allows the user to temporarily pause the recording and then continue.
- Record Switch: The user can activate or deactivate automatic recording.
- Keep/Delete: Keep or delete the recording during the conversation or in a follow-up time.
- Never Record: All conversations that are not recorded due to no user in Recording Insights or the recording rule Never record.
The live call view varies depending on the Recording Type. It is possible that you have fewer options.
Position | Description | |
1 | Current Calls Scenario ID | |
2 | Current recording status and whether the user can manually control the recording process. Status indicators:
Control options:
| |
3 | Additional Information Display of the user-defined fields and checkboxes, see Metadata. | |
4 | Notes Additional notes about the conversation, see List View. | |
5 | Course of the conversation Time stamp of actions affecting the recording, user ID, time stamp, and system information. The following system information is displayed:
|

Record Conversation
|
|
The scenario ID is not identical to the recording ID of Recording Insights. The recording ID of Recording Insights is generated at the end of the conversation |
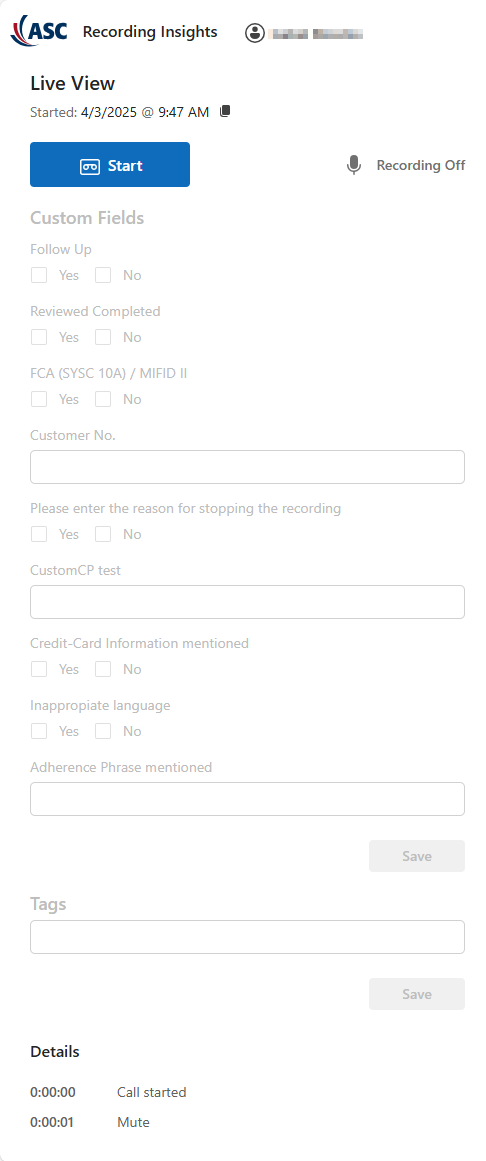
 Live View to open the live view of the conversation.
 - Click on Start to start recording the conversation.
- The following window appears.
− The user-defined fields and checkboxes are activated with the recording.
|
|
|
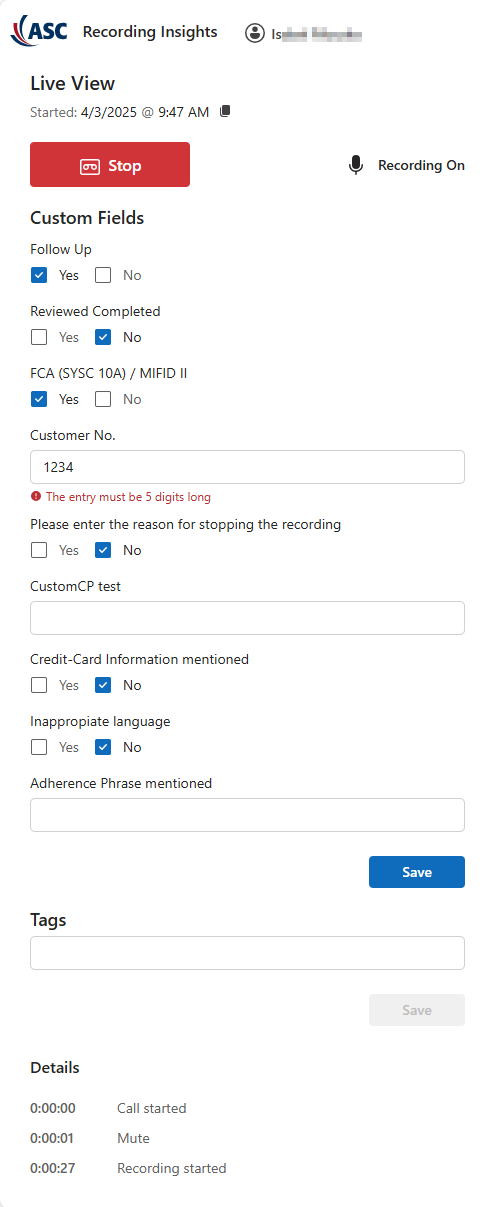
Stop recording
For start and stop settings, see administration manual Recording Insights > tab Settings > User configuration > tab Rules > Recording - Audio - Record On Demand
- Click Stop recording to stop the recording.
- The following window appears.
- The customized fields and checkboxes can still be edited.
|
|
Continue recording
The recording of the conversation ends as soon as you leave or end the conversation. The live view of the conversation is closed automatically. |

Wrap-up Time
|
|
After the end of the conversation, you have a wrap-up time at your disposal. In this wrap-up time, you can change the tags, check the content and copy the scenario ID. |

Specifications and description of custom fields and check boxes
Specifications for custom fields and check boxes
- Field Test Feld Kundennummer
- Only numbers, exactly 10 numbers
- Maximum of 2 fields Test Feld Kundennummer
- Check box Test Checkbox
- Trigger action: Set TTL to change the retention time
- − Yes - TTL: creation day + 500 days
− No - TTL: creation day + 90 days - Field Docu Field
- Max. 30 numbers and characters
- Maximum of 3 fields Docu Field
- In the field Test Feld Kundennummer, enter the customer number.
- Once the 10 numbers have been entered, the button Save is activated.
− If more than the permitted 10 numbers are entered, an error message is issued.
− If fewer than the permitted 10 numbers are entered, saving the entries in the field Test Feld Kundennummer is not possible. - Click on
 Add field to add another Test Feld Kundennummer.
− If more than the permitted fields are added, an error message is issued. - Click on the icon
 to delete the field Test Feld Kundennummer.
- Under Test Checkbox, tick the check box Yes or No to change the retention time.
- The button Save is activated.
If Yes is saved, changing the selection to No is no longer possible.
If No is saved, changing the selection to Yes remains possible.
- Enter text into the field Docu Field.
- Enter a minimum of 1 character so that the button Save is activated.
− If more than the permitted 30 numbers and characters are entered, an error message is issued. - Click on Add field to add another Docu Field.
− If more than the permitted fields are added, an error message is issued. - Click on the icon to delete the field Docu Field.